Mastering breakout rooms will give your events a professional feel and allow attendees to focus on their experience. Use this checklist to make sure you are set up for success.
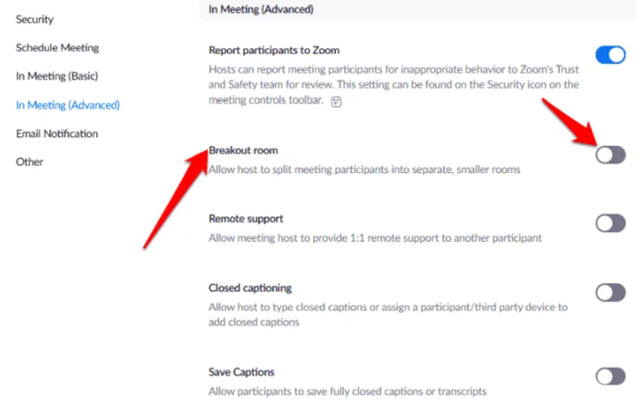
Before you start your meeting, you will need to make sure breakout rooms are enabled. When you login to the Zoom homepage, go to settings and turn on Breakout rooms. Breakout rooms cannot be enabled from the Zoom app – this feature is exclusive to the online settings.
To start your breakout rooms, click the breakout room button on the actions bar at the bottom of your screen. This will only be available if you enabled breakout rooms in the first step.

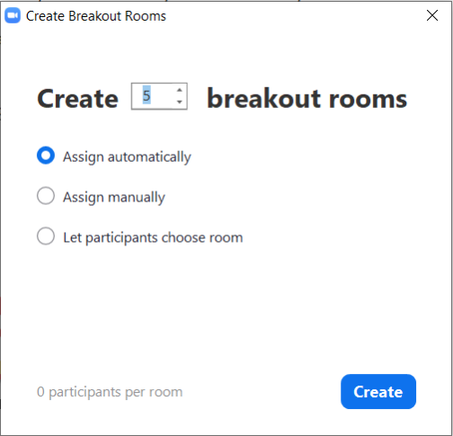
There are three options when starting your breakout rooms:
-Assign automatically: Attendees will be randomly sorted into rooms evenly
-Assign manually: You will have to choose where each attendee goes in each room
-Let participants choose room: This feature will only work if attendees have their Zoom updated to the latest version. This gives participants the ability to self-select which room they would like to join without needing intervention from the host.
Choose the option that works best for your event. Assigning automatically is the least time consuming, while letting participants choose their own rooms can take longer, if all attendees are not updated to the latest version of Zoom. If you decide you want to let attendees choose their own room after you’ve created the rooms, you can adjust in the breakout room settings (more details below).
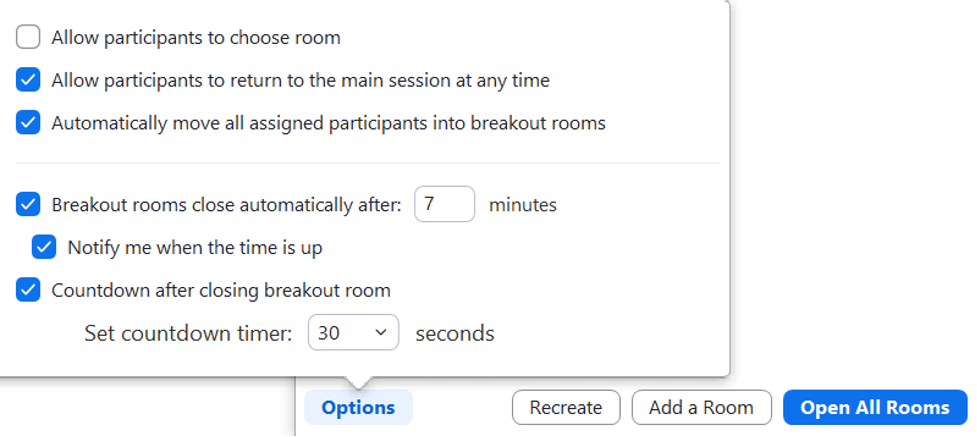
Before opening your breakout rooms, be sure to review the breakout room options. The options will be automatically set to settings you last used for breakouts.
-Allow participants to return to the main session at any time – This option creates a “Leave Room” button during the breakouts. You should always check this if you allow participants to choose their own room, in case they have issues and need to return to the main session for help.
-Move all participants to Breakout Rooms – This option automatically moves all participants to a Breakout Room when you select the Open All Rooms option.
-Set a timer – You can put your Breakout Rooms on a timer that forces everyone to return to the main session when the timer expires.
-Countdown after closing Breakout Rooms – This option gives participants in Breakout Rooms a visible countdown to when they will return to the main session, giving participants the time they need to wrap up the discussion. The Broadcasting message feature only lasts for a short time, so attendees might not see your messages that time is almost up!
Managing Attendees In Rooms

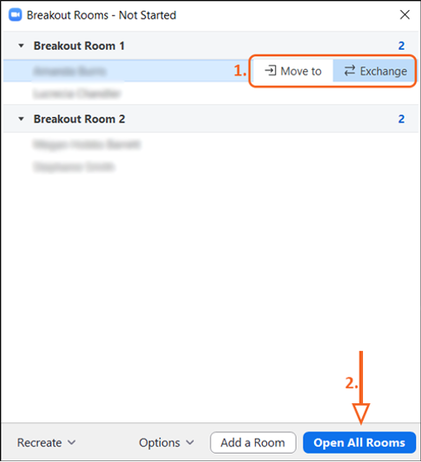
If attendees join after you start the breakout rooms, they will appear on this screen as “Unassigned.” To assign them to a room, hover over their name and choose their room. As soon as you click their room assignment, they will be moved into that room.
-While using breakout rooms are that the chat feature will only send/receive messages within the same room.
-The preloading breakout function can be tricky to use. Make sure you are using the Zoom template to create your rooms.
-After your rooms conclude, you can recreate the rooms using the automatic assignment tool as a randomizer. The more people you have in the meeting, the better it will work as a randomizer. With less people, you will have to do more manual exchanges to make unique rooms.
The more breakout rooms you have, the better you will get at it. This is a hard feature to practice by yourself. If you’re using breakout rooms for a work event, test the technology with your staff beforehand. You can find more information on breakout rooms, meetings, webinars, and more on Zoom’s comprehensive help center.
The Chamber is here as a resource and can assist with Zoom questions you may have. Send all Zoom questions to Operations Manager, Olivia McKay, at [email protected]


 RSS Feed
